¶ How to Create Your Container
Once you’ve joined our Discord server or added Discord-Linux bot to your server, initiating your container setup is a breeze.
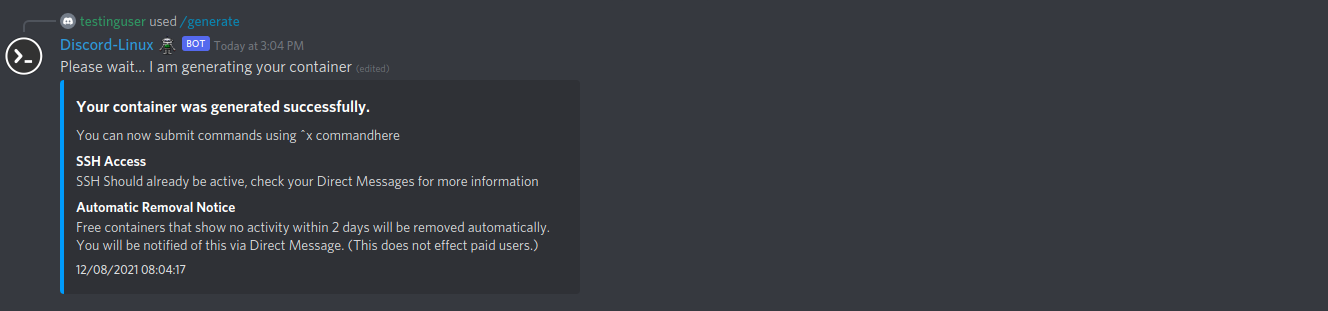
Simply execute the /generate command to create a container that runs on the Ubuntu operating system.
To select a different operating system for your container, utilize the /genos command and make your choice from the available options in the dropdown menu.

Any containers that were not extended for 7 days will be automatically deleted every day at 6 PM EST (Eastern Standard Time).
You will receive the root password and SSH connection details for your container through Direct Message. If you created your container using the Web Control Panel, the default password will be
DiscordLinux.
¶ Your Unique SSH ID
Once you’ve successfully created your container, a unique SSH ID is automatically generated and linked to your account on our platform.
This SSH ID is specifically associated with your current account and serves as your user identifier for various purposes, including container upgrades. To quickly retrieve your SSH ID, simply execute the /my-id command.
¶ Linking Your Accounts
Easily link your IDs from Revolt and Guilded by utilising the /bind command.
All you need to do is choose the platform you’re integrating and provide your corresponding ID.
Upon completion, your container becomes seamlessly accessible through these platforms under your user profile.
¶ Container Expiry Policy
The containers have a standard lifespan of seven days, after which they will automatically expire and be deleted.
Upgraded containers, however, enjoy an indefinite duration of availability, as long as your key remains valid.
To extend the duration of your free container, you can use the /extend command, which will add another seven days to the expiration date from the moment you issue the command.
The maximum amount of days extended will not exceed seven days.
Here’s an example of how to check the remaining time on your container:

To extend time of your container, follow this example:

Please note that notifications regarding container removal will be sent exclusively to users within the same server as the @dlinux-Notifs Discord bot, provided they have enabled Direct Messages.
To include the @dlinux-Notifs bot in your server, simply execute the/invite-notifs-botcommand.
¶ (Web) Control Panel
To utilise our control panel, visit https://ctl.ssh.surf.
Your login credentials for the control panel will be sent to you via Direct Message immediately after creating your first container.
Remember to securely store your login details since they will be provided only once.
In case you misplaced your login information, please reach out tosnxravenon Discord for assistance.
Our control panel empowers you to efficiently manage your container. This includes the ability to start, stop, and restart it, as well as gaining instant access to the terminal without the need for an SSH connection.
The control panel also offers insightful graphical representations of your container’s resource usage and provides a comprehensive view of all running processes for seamless management.
¶ Enhancing Container Security
Upon generating your container, you will receive a password via Direct Message.
This password can be changed at your discretion, and you have the flexibility to modify it as many times as necessary.
To change your container’s password, execute the following command:
/x cmd: echo "root:newpasswordhere" | chpasswd
Furthermore, you can alter the password by logging in through SSH and employing default Linux commands as shown below:
passwd root
Ensure that you enable privacy mode with
/privacybefore submitting the command.
Prior to executing the command, verify that the slash command has loaded correctly.
In addition to these methods, our API provides an option to reset your container’s root password.
For further details, please refer to: API Documentation
¶ Executing Commands
Please note that if a command initiated through Discord-Linux bots necessitates user input, the process will indefinitely wait, as interactive commands are NOT supported.
You can conveniently submit commands to your container using the /x <command> syntax after generating it.
Each container is exclusively linked to a user through a unique User ID, guaranteeing that no other users can execute commands on your container, ensuring its security.
Here’s an illustrative example of how to utilize the /x <command> syntax:

The output of the executed command will be displayed once it has completed:

With the /x <command> syntax, you have the flexibility to run Linux commands within any public Discord channel where the bot has been granted access.
It’s important to note that while each user has “root” access to their own container, it does not equate to full “root” user privileges, leading to certain limitations in terms of kernel access and capabilities.
¶ Navigating the Filesystem
Just like in a typical Linux environment, you’ll need to navigate directories, create files, and manage directories within your container.
Let’s demonstrate how to change to the root directory of the container with this example:

When you execute the command to switch to the root directory of the container, the bot will confirm the change in its working directory:

To view the contents of the directory, use the command /x cmd: ls:

Note: The File Navigation commands, such as cd, pwd, and ls, have been custom-built by our team for use with the bot.
While these commands closely resemble their Linux counterparts, please be aware that they may not perform identically in all aspects. If you encounter any issues, kindly inform us.
¶ Container Startup Script
Upon your initial use of the container, you’ll encounter a script named start.sh located in the root directory. This script is executed during boot time and provides you with the opportunity to configure commands or services you wish to run during startup, including systemctl services.
Let’s dissect the purpose of each line within the start.sh file:
#!/bin/sh
This line instructs the system to set a container ID within ENV.
export CID=$(basename $(cat /proc/1/cpuset))
Here, the container ID is exported as a system variable for reference.
service ssh start
This command initiates the SSH server during system boot.
sh /var/tools/getsystemctl.sh
This line executes a replacement for systemctl, which is required for managing system services.
tail -f /dev/null
The final line is responsible for keeping the container running. It’s essential not to remove this line.
Once you’ve finished editing the
start.shfile, it’s crucial to run thechmod +x /start.shcommand to make it executable. Additionally, it’s important to edit the file using SSH rather than the bot to ensure that changes are properly saved and applied.
¶ Notification Service
Our service now incorporates an integrated Notification Service designed to keep you informed about the progress of your installations using auto-installer and other important notifications from our team to you.
This Linux program serves as a notifier, sending alerts to your Direct Messages.
To utilize this service, simply employ the following commands:
$ notif discord|revolt "This is a test message"
It has also been engineered to generate a message from arguments in the following manner:
$ notif discord|revolt This is a test message
Both of these commands will produce the same notification message, streamlining your experience.
This will only work if you are within our Support Server OR you have added the notificaton bot:
@dLinux-Notifs#1282you can invite the bot using/invite-notifs-bot
¶ Creating Files
In its latest update, the bot introduces support for modals, allowing you to seamlessly write files to your container’s filesystem using the /write-file slash command. Upon executing this command, a form will appear, as depicted below:

The resulting output will appear as follows:

Subsequently, you can examine the contents of your newly created file:

¶ Edit Files
Use the /edit-file command with the full path to a file to edit it from within your container. A form with the file’s contents will appear, allowing you to make changes easily. However, only use this command for small files and not large ones with hundreds of lines.

¶ File Upload Methods
Uploading files to your container is a breeze, and we offer three straightforward methods for your convenience:
1) SFTP (SSH File Transfer Protocol): You can easily upload files to your container by connecting to its SSH port using an SFTP client.
Connection details:
Host: ssh.surf or sftp://ssh.surf
User: root
Password: Your Root Password
Port: Your SSH Port
2) Command Line Uploader Tool: Our Command Line Uploader Tool enables you to upload files directly from your computer’s command line. To get started, use the /upload-key command to generate an upload key. Once you have the key, execute the following command on your personal computer:
Linux/WSL:
bash <(curl -s https://ssh.surf/uploadInstall)
Mac:
bash <(curl -s https://ssh.surf/uploadInstallMac)
This initiates the tool installation process and prompts you for your SSHID and KEY. During installation, a Linux binary called sshup will be set up at /usr/bin/sshup, and appropriate file permissions will be configured using the chmod command. To upload a file, utilize the command sshup <filename>. Upon successful upload, you’ll receive output messages similar to this:
~ ❯ sshup woo.js
######################################################### 100.0%
📝 woo.js 💾 (418.00 Bytes) ➡ 🐳 / ➡ 🌐 SSH34457493201438
3) Manual Upload with Curl: If you prefer not to use the client, you can manually upload a file using the curl command, like so:
curl -X POST -F myFile=@YOURFILE "https://up.ssh.surf/?cid=SSHIDHERE&key=KEYHERE"
You can upload files without any restrictions using the script, as long as you stay within your file system’s quota.
Additionally, we now offer the ability to upload files directly within Discord-Linux using the /upload command. However, please be aware that this command is subject to your account’s upload limits, and it requires an attachment.
WARNING: Files uploaded using
/uploadwill also be stored in Discord’s Content Delivery Network (CDN). Avoid uploading sensitive files or confidential data to this service.
¶ Checking Open Ports
Each container gets a set of 3 ports open, one is dedicated to SSH and the other two ports are random ports you can freely use.
If you want to check your ports, use the /ports command.

¶ Domains & Subdomains
You can effortlessly host content within your container using our Web Proxy service. Here’s a step-by-step guide to getting your website online:
Step 1: Register an Account with Our Proxy Service
To get started, register an account with our Proxy Service by running:
/register-vhost-account
Your login details will be sent to you via Direct Message. Be sure to store these details securely for future reference.
If you already have an account and are transitioning from another platform, please run this command again.
The service will seamlessly transfer your user configurations within Discord.
Ensure that you have a webserver already set up and running.
Step 2: Generate a VHOST within Our Proxy System
Execute the following command:
/create-vhost

This will present the form displayed above. You have the option to provide your own domain or claim a subdomain provided by us.
The following domains are available for use with any subdomain:
ssh.surf,shells.lol,hehe.rest,dcord.rest,secure-shell.live,nodejs.lol,tcp.quest
Additionally, specify the port within your container that is listening for your service.
You can see occupied ports when you ran
/ports, it’ll show a list of ports and unused ports. Look for the port that is missing from the unused port list.
During the registration process, an SSL Certificate will be automatically generated for your VHOST. You can find both the VHOST and the SSL Certificate within your web panel account.
Do you have your own domain?
Simply set anARecord pointing to:132.145.188.157at CloudFlare or your own prefered DNS provider.
Once the A record has propagated, you may run the/create-vhostcommand and bind your domain to a port.
Need to make a quick IP update or change the port for a VHOST?
Simply rerun the/create-vhostcommand through the bot to update your settings.
Please refrain from changing your password within the proxy panel at this time.
We will provide you with a command to change your password in the near future.
¶ Deleting a VHOST
To remove a VHOST from your account, simply execute the following command:
/delete-vhost domain.example.com
This will delete both the VHOST and the associated certificate.
¶ Secrets Service
Service URL: https://secret.ssh.surf/
Our service includes a complimentary Secrets Service, allowing you to securely share sensitive information like passwords, authentication data, or tokens, all fully encrypted.
When you use this service, all data is encrypted within the container before it’s transmitted. This ensures that your data remains confidential and inaccessible to anyone, including our network administrators.
The service is powered by a binary named sec.
You can interact with it in two ways, either via the command line interface (CLI) or through the website:
Using Program Pipe:
root@SSH32345643456:/# echo "hello" | sec
Secret is now available at:
https://secret.ssh.surf/#23fc2f8d-7a11-4942-aad4-db2917d0005a%7CgksaOYP7LKKgG9uYlOCU
Using Program Argument:
root@SSH32345643456:/# sec "hello"
Secret is now available at:
https://secret.ssh.surf/#46fe99bd-adb4-49b8-9342-8fbe6c1913ba%7CwNtBYnlBSghUFTwvCyXN
To ensure the encryption process, you can view the client’s raw bash script here.
PLEASE NOTE: Once a secret has been viewed, it will self-destruct.
Ensure that the receiving party is informed to save their secret data.
¶ Monitoring Resource Usage
Keep an eye on your container’s resource utilization directly within Discord using the /stats command:

¶ Exporting Your Container
Easily obtain a download link for your entire container’s filesystem with the /export command. This feature comes in handy for creating backups or transitioning to a different host.
Exports can be imported into another docker host of your choice. However, you must be using an ARM CPU within the host you import the image to.
¶ Resetting Your Container
Starting afresh is a breeze with our system. Simply use the /destroy command to delete your current container, and then spin up a new one using /generate or /genos. You’ll be back up and running in no time.
Please exercise caution when using the
/destroycommand as it will delete all data within your container. Take a moment to consider your decision before proceeding.

¶ Upgrades Made Easy
Upgrading your container is a straightforward process that you can conveniently complete at our upgrade store, accessible via https://ssh.surf.
Before proceeding with an upgrade, ensure that you have a running container in any of our supported platforms and are familiar with your SSHID. Here’s a step-by-step example of how to transition from the “Free” plan to the “Pro” plan:
-
Prepare Your Container and SSHID
Make sure you have a running container in one of our platforms and have your SSHID handy.
-
Visit the Upgrade Page
Head to the upgrade page and enter your SSHID.

-
Complete the Checkout Process
Follow the prompts to complete the checkout process using your credit/debit card.

-
Order Confirmation
After successfully processing your upgrade, you will see the “Order Confirmation” screen, and you will receive a license key.

-
Applying the Upgrade
Once you have purchased an upgrade, you will receive a license key. Apply this upgrade to any container you generate using the
/add-keycommand. This command utilises a modal form to protect your key’s privacy.

-
Automatic Container Upgrade
After submitting the license key with the
/add-keycommand, your container will be upgraded automatically.
Even though the container will be automatically upgraded, only Memory and CPU limits will be upgraded, leaving Storage and Network Ports not upgraded. This is due to software limitations. However, it can be solved by regenerating your container. Always make sure you have a copy of your data before doing so.

-
Enjoy Enhanced Resources
You’ll now have access to additional resources as a result of the upgrade.

-
Check Key Status
To check the status of your license key, including its status, date of order, and expiration date, you can use the
/key-statuscommand.

Remember, expired license keys are automatically removed, causing the container to revert to default limits (except for network ports and disk). You can purchase upgrades at any time to continue enjoying the benefits.
¶ Join Our Mission
At SSH.Surf, we are dedicated to keeping our services online and offering even more powerful machines to our users. Your support can play a pivotal role in helping us achieve this mission.
Here are two meaningful ways you can contribute:
-
Container Upgrades: Enhance your own experience while supporting our services by purchasing a container upgrade. Enjoy additional resources and features while ensuring the sustainability of our platform.
-
Donations: If you’re feeling particularly generous, you can make a direct donation through the link below. Your contribution, no matter the size, goes a long way in helping us provide the best possible service to our community.
Your support matters, and we sincerely appreciate your commitment to our cause. Together, we can continue to deliver top-notch services and empower users like you. Thank you for standing with us!